35×50 
Cana video mapping
cube mapping
actual 3-d object mapping(first tries, just color change)
Ceiling mapping
after effects’de tavan mappingi nasil olur ornegi.
video samples
https://vimeo.com/home/myvideos
2 mapping tries
Helpful Guide for setting up the project
MANAGEMENT OF A PROJECT
1)PREPARATION Best way to work is next to your video projector but that is not always possible. In any case there are different ways to go. Resolution approach: you have to consider the specs of your video projector and match your project with the maximum resolution of the projector. Video approach: you want to set your work/project on PAL/NTSC standards ( for example 720X576 ) or HD in case you want to work with an HD projector.
2) THE BLUE PRINT Next thing would be in most cases to take a picture of the building or the object you are going to project on. This image will be used to get a layout to create masks or 3D references for your projection points.
This is the most delicate part of the process. You need to use a camera lens that has the same ratio as the projector lens. Then you place the camera beside or on top of the projector lens, and make the photo: what is important is that the camera lens is in exactly the same position as the projector lens.
Here you can see different examples of succesfull and unsuccessful photos:
In ‘map picture number 1′ and ‘map picture number 2′ we can see 2 examples of a bad camera positioning . These are the pictures Olga Westrate took from a different angle from the video projector lens. That camera angle of view is only critical with very wide and very narrow angles. So you only need to be accurate in selecting a camera lens if you are doing very short or long throw projections
3) SETTING UP
Video-mappers, like vampires, work at night. Or, if that´s not possible, they try to make their projection area as dark as possible. They are patient creatures and their first commandment is: setting up consumes a great deal of the time.
First of all, you have to place the projector exactly in front of the object you want to project on. Side projections are very unlikely to work.
You might need a distance measuring laser tool and can also use a bubble level to make sure that the position of the video projector lens is perfectly horizontal and that matches the camera lens position. Once the video projector is placed, and the cables have been carefully taped and protected, you can start your testing. It is also important to know that a projector is very sensitive to vibrations and weather conditions. You don´t want to see an ugly jittering image right in the climax of your show, and likewise you need to think about the variable weather conditions, so you should take measures and find a suitable stand and rain protection for the projector.
storyborad

storyboard draft

new poster

Poster change
Some changes I made on the poster.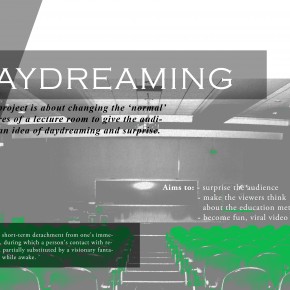
aftereffects learning
One of the video is the mapping on the file in the class. The other is the representation of possible mapping(learning aftereffects).
https://vimeo.com/canasakaoglu
Software Information
The biggest problem I’ve faced is that there are many softwares in the internet but there are not many sources explaining them. I was trying to get an general idea of several softwares and I find an great blog about it. Here’s the information I found which is written by a person who tried them all;
The Setup – Software
Here is a pretty quick run down of a few programmes that I know of, and that I’ve used.
I’ve found Arkaos Grand VJ to be an excellent piece of software for creating live visuals. It is solid and reliable, easy to use, and it plays well with others. And because I use both a Mac and PC, it is my software of choice.
Each new iteration of the software adds useful and powerful features, further enhancing the overall performance. MIDI controllers are very easy to set up, and it also supports OSC (allowing control from ipod/iphone/ipads and probably Android devices too). For the Mac version it also utilizes Quartz Composer – an easy to use programming tool for OS X that allows you to create amazing effects, visuals, and visualizers. More on that later.
I’ve had a couple of helpdesk experiences with the team (based in Copenhagen I think) and they have been great to deal with.
You can download a trial version here to play around with.
I haven’t spent a lot of time with Modul8, but I have been impressed with I have seen. Because I primarily mess around on a PC I haven’t had a lot of time to explore its full potential.
At first glance it has some very powerful functions, and supports a number of features. It appears to have a strong mapping function, something that I think Grand VJ lacks (however I believe this can be rectified through plugins).
It is Mac only but since most VJ outputs require the dedicated graphics processor that Mac’s offer so it shouldn’t bother too many people.
Download a trial version here.
This software is good. Very good. It takes a lot of the features that I like about Grand VJ and builds on them. I found it a bit too advanced for me when I first started messing around with visuals, but now I think it definitely deserves another look.
On top of the VJ side of things (it supports Quartz/VST/OpenGL) it also has a strong video mapping component to map the output to an object of your choosing.
This is available for both Mac & PC. Trial available to download here.
Whilst not specifically a piece VJ software, I have become quite fond of it for what it can do – I am constantly amazed at how powerful this piece of software is. This is software for projection mapping first and foremost.
The most recent version (6.0) appears to be much more stable than earlier versions I’ve used and with a much friendlier interface. It has support for MIDI and OSC which is very handy when you are tweaking with the corners of outputs to map them exactly to an object.
And the full version is completely free to download and use here.
If you are new to this, I recommend downloading each of the available demos and having a good long play around with the features. Taking the step to purchase a full version (which will usually remove a watermark, and allow for saving) is one not to be taken lightly – at around $300-$400 at least for a license it is an expensive step.
As I mentioned earlier – this is by no means an exhaustive list. These are just those that I know of and are familiar with. If there are others out there that you know of and can recommend, post it below and I’ll check it out.
poster sketch
Using the actual room that I’m going to map as a visual helped the poster. I can distort the image and it represents the actual mapping I’m going to do.
